One young Catholic family on a Journey towards Intentional and Communal Sustainability. One Artist, one full time Mama and two babies, we'll tell you about all our successes, and failures, as we try to make it in our overly Consumeristic society on just the bare necessities.

Tuesday, May 29, 2012

Some Spring Photos

Chicken's in the playhouse
 Because I've been remiss about photos since I can't find my camera charger.  Here are a few goodies from the last week or so.  More to come when I upload them from my phone
Look Mom!  A radish!  (from our garden)

Helping to clean all the garden veggies

First time doing s'mores, at the Fairy Park

Friday, May 25, 2012

Thoughts

So, the homestead is going great, or as great as we can expect out of this beautiful, suburban, desert.  We got our first radishes from the garden last night and they were DELICIOUS.  Seriously, SO good.  We also have lettuce, and swiss chard.  Oh, we have Chard out the wazoo, but we have decided not to consider the chard a "first fruit" as it's actually last year's crop held over from the mild winter.  And by mild I mean that it was only covered under 2 feet of snow for a couple of weeks at a time. :)

But---  we're starting to reach our limitations on this little piece of property.  We are already keeping illegal chickens, and we dream of one day having a goat or 2, but I won't risk THAT- plus we just don't have enough yard for her.  We planted a bunch of fruit trees this year, and we've been planting in the front yard too, but nothing we plant seems to grow- it just stays 3 inches tall.  The soil is so nasty.  I will say this for our little yard, though- its alive!  I came home from the park with the girls the other day and there were bunnies, robins, black birds and squirrels all roaming my yard at noon day.  It made me feel like Snow White- now if only I had 7 dwarves who did my bidding....

So we've been putting serious thought into where our new homestead- possibly a permanent one- should be.  We had new friends over last night talking about the possibilities, and we're doing our research.  And praying.  Our requirements are simple, but not easy: within a day's drive of family, fertile soil, artistic AND Catholic communities, within an hour and a half of a major city- yeah, see simple, right?  Not.

So does anybody have any idea of how to look for such a place?  And do you want to come with us? 

Wednesday, May 16, 2012

Whole Wheat Kefir Breadmaker bread

Unsoaked in the back, Soaked up front.  The soaked one was a bit too wet, so it fell just a little, but it's still delicious.
I'll confess, I am not a very good baker.  I'll blame it on the altitude my whole life long.  At least as long as I'm living above sea level!  But honestly, the reason is that I'm spacey.  Super duper spacey.  I tried to keep sourdough, which I LOVE, and I had some successes, especially with Dyno-mom's super easy method, but mostly I just forgot about it, and I killed my started twice.  So, my husband brought home my mother-in-law's decades old breadmaker that was maybe used twice back in the 90's.  At first, I was skeptical, but then I started using it, and I fell in love.  I made fresh, whole wheat bread for my family at least once, usually twice a week for months and months.

Until it died.

I was so sad at the bread maker's death, I had a bread maker funeral.

Not really.

I just stuck it in the garage.

and Joey was so sad for me that he gave me free reign to order a new breadmaker of my choosing.

So one night, at 3am when Beatrice refused to sleep and Charlotte had taken over my side of the bed anyway, I got up and ordered a new one.  I like to order things at 3am.  I don't worry about research at that time of day and just go with my gut.  It's much more fun, if not necessarily the smartest method of using Amazon.  But it worked out great this time!

I got me a Cadillac, Mama!

So, now that my bread maker is not as old as I am, and it can fit a whole 2 pound loaf, I've been doing a lot more with it.  And I've been loving it!  Joey found a bread maker cookbook at the thrift store, and this recipe is a derivation of their Buttermilk Bread recipe.  But it's evolved so much, it's nowhere near it.  It's so yummy, and SOUR, not quite like sourdough, but close.

No, my flour is not soaked in this recipe, because it's for the bread maker.  But you CAN soak it, and that would add an added delicious, as well as an added health benefit.  For the Soaked version recipe, see below.

On to the recipe.

If your bread maker tells you to add the yeast first, reverse it so the liquids go in first and don't touch the yeast.  I don't know a lot about bread makers, but I've never run into one that tells you to put the flour and yeast in first, but all the recipes I read add this disclaimer.

Whole Wheat Sour Kefir Bread

1lb loaf:
  • 1 Cup dairy kefir
  • 1/4 Cup water
  • 1 tablespoon sucanat other natural sugar
  • 1 tablespoon oil- I like Safflower oil, but sunflower would be good.  Olive ok.  Butter works, but makes it dense
  • 1 1/2 teaspoons salt 
  • 2  Cup whole wheat bread flour
  • 1 1/4 Cup unbleached white flour 
                      OR
  • 3 1/4 Cups Whole Wheat Bread flour 
  • 1 tablespoon Gluten
  • 1 teaspoon rapid-rise active dry yeast

2lb loaf:
  • 1 1/2 cups kefir
  • 1/2 Cup water
  • 2 tablespoons sucanat
  • 2 tablespoons oil
  • 2 teaspoons salt
  • 4 1/2 Cups whole wheat bread flour
  • 1 1/2 Cups unbleached white bread flour
               OR
  • Scant 6 Cups whole wheat bread flour 
  • 2 teaspoons rapid rise active dry yeast
  • 2 tablespoons Gluten

Add ingredients to your bread maker's pan in order listed here.  Make a little Volcano hole in the flour to set your yeast in on top to make sure it doesn't get in contact with your wet ingredients until the right time.  Otherwise, follow your bread maker's directions, and make sure you run it on the whole wheat cycle.  The longer the cycle, the better, because whole wheat flour needs a lot more time to soak up the wet ingredients.

For a soaked bread, which is surprisingly similar to Sourdough in taste and texture, and adds many health benefits, most notably less Phytates.  Want to know more about why to soak whole grains?  Read the Kitchen Stewardship's explanation.

Soaked Whole Wheat Sour Kefir Bread: 1lb loaf:

The night before:
Combine 2 cups of flour with 1 cup of Dairy Kefir and 1/4 cup warm water.  Mix it up good until it's nice and gooey.  It'll look gross and sloppy- but that's good. Cover close with a cloth and let sit overnight or longer if you'd like, at room temperature.

The next day:
Plop that Slop into the bread maker's pan and add just a bit of water if it's really dried up.  Not much.  A spray bottle is good at this point.  I prefer to wait until all the ingredients are mixed and spray a little at a time until all the flour is absorbed. 
Add:
  • 1 tablespoon sucanat
  • 2 tablespoons oil
  • 1 1/2 teaspoons salt 
  • 1 Cup Whole Wheat bread flour
  • 1 TB Gluten
  • 1 teaspoon rapid-rise active dry yeast

Set the maker to Whole Wheat and let it go.  Check on it while it's mixing and if it's too dry, use your spray bottle of warm water here to spritz less than 1/4 cup until it's all combined.

Enjoy!

Tuesday, May 15, 2012

Easy Toddler Friendly good lunches

So, Charlotte is now 2 and a half.

If you ask her, she says "NO, I'm 2!"

and if you ask her how old Beatrice is, she'll smile and say "3, no...4, no....5, no.... almost 1"

Cute.  But whoa, does this kid have attitude!  She's been driving me up the walls with her little sneaky ways lately.  So, I've been sneaky too.  Specifically when it comes to meal time.  Sneaky, sneaky mom!

I learned that she has recently started to love crunching.  YAY!  That means fresh veggies are a go, finally!  AND since she LOVES dip to go with them, I now how fresh cut veggies and dip on hand at all time.  But not that crummy stuff from the store.  No, oh no.  I make my own version of a ranch dip with full fat yogurt and other yummies, and now you can too!  Easiest part?  I wait until my yogurt container is half empty, then make the dip and leave it in the container in the fridge so I always have it on hand.  You should too, it makes for easy snacks or a quick side for a meal, and it's Charlotte's new favorite.  And adding the full fat yogurt to the fresh veggies means my kid is getting her vitamins and a full tummy at the same time!
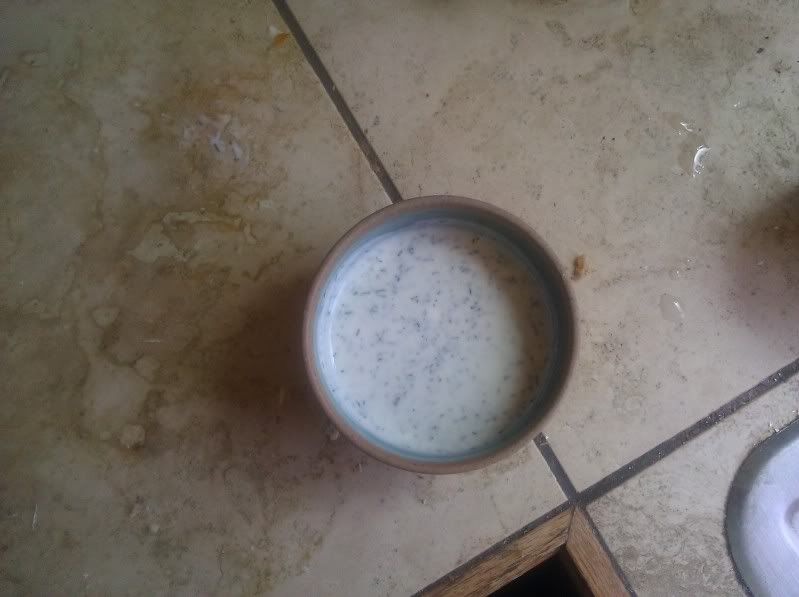
Yogurt Ranch Dip

2 Cups whole milk plain yogurt- homemade or store, I use Stonyfield farms right now because it's thick and creamy and without additives, and it's organic, even if they do have a sordid past.  My homemade yogurt has been bunk lately, but when I get that figured out, I'll have my own raw milk yogurt to use!
1/2 sour cream (optional)  Honestly, adding the Sour Cream makes it thick and more like the dip we're used to, so if you're having guests, it's a good addition.  Otherwise, add if you want, not if you don't.  Homemade, again, if you can, then it can be raw!  Or not if you can't.  Either way, FULL FAT!
1-2 tablespoons of lemon juice.  More or less to taste

The rest are spices, in the order I add them from most to least- add more or less if you want, use fresh if you have it, and most importantly, if you let it sit in the fridge over night, it will get more flavorful, but it is absolutely fine to go straight on the plate as well.

garlic- powder (or garlic salt, in which case, reduce or eliminate the additional salt) OR fresh, smashed and finely chopped garlic.  If you use fresh, the taste will come through MUCH stronger the second day, so use your good judgement on this one.
onion -powder (not flakes) OR better yet, fresh green onion chopped finely 
dill weed (dried is best, actually)
salt
fresh ground pepper
parsley (Fresh is WAY better, but if not, you won't taste it until the 2nd day in the fridge)


It's that easy.  Really.  And honestly, if you don't have everything on this list, that's a-ok.  And you can add different things too, if you'd like.  Like dried basil- that's always good.  And sometimes I add oregano.  It depends on how I'm feeling and what I have in the pantry.  But whatever you do, don't go easy on the garlic!   MMMMM..... I LOVE garlic!  and dill.  Dyno-mom will attest to my serious love of dill, won't you?

Now, Dip, and enjoy!

Monday, May 14, 2012

Homemade Bonemeal for my tomatoes

So, you all make your own bone broth, right?  It's amazing, isn't it?  But what do you do with those bone?

A lot of people bag them and throw them into their trash, not wanting to attract flies to their compost.  We've been composting them straight from the broth in our enclosed compost bin, which keeps flies down, but not completely, and I've thought recently, is it really making the best use of these still nutrient rich bones?

And then I noticed that my tomato plants that a friend gave me were starting to get white tips on their leaves.  I think it might be a symptom of being grow light raised, but she told me they had been tempered already, so I'm worried that it may be because our soil is so nutrient depleted.  Such is the problem with living in a Beautiful Desert.  Our yard looked so nice when we moved in, but we soon realized it was actually dead.  The grass growing in the middle was only growing because of constant watering and probably chemicals, and the rest of the "yard" was just mulch on top of layers upon layers of gardening cloth.  So our dirt is actually just sand- dead sand.  We've been working so hard this year on conditioning it, and it's been trouble, but we're having some success.  But I want to keep it up, so I decided to make my own bonemeal from the bones leftover from my broth.  Now I don't have trash, or flies!  Well, I still have flies, and still have trash, but less of each!

How to use your whole Chicken:

1) Eat her.  If you raise your own, then those first steps are up to you- we haven't started raising meat chickens just yet.  Soon, I hope.  But I've heard that feathers make good compost, and that the beak and feet are especially good in broth.  I've make chicken foot broth before with grocery store feet, and it was amazing.  But I haven't found a source of free range chicken feet yet.  Anyway- eat your chicken, however you like.  Then make your broth.  Check out my best broth yet here.

2) When your broth is done, after 2 or 3 days, the bones should be able to be crushed in your hand.  Drain off your broth and store.  Then spread out your bones, and any other gunk that's attached to them, on a cookie sheet and dehydrate in your oven overnight, or for about 12 hours, with the temperature set between 170-200.  If you've got a convection oven, you can set it lower, and it will probably take less time.  If not, set it at least at 170- you don't want things to take so long they start to go rancid.  Another option, that I didn't choose, is to set the oven at 500 and let it go for an hour or so.  That will burn off all the extra gunk, but it will also stink up your house, and possibly loose some important minerals and stuff.  According to Joey, Bone Ash is an important ingredient in glaze materials, and is made by bisqueing bones in the kiln up to 1200 degrees.  The bones don't turn to ash, but get very white and hard and brittle, and you can crush them easily then too.  But for your purposed, dehydrating is all you need to do.

3) After you bones are sufficiently dehydrated- dry and brittle, and easy to crush with your hand- SMASH 'EM UP!  You can include the gunk if you'd like, but I just separated the bones as best I could and composted the rest (it's dry, so less fly issues). I used a combination of the bottom a glass jar and my mortar and pestal to grind up the bones and then sifted them through a small sieve to get them nice and powdery.  They'll look like this:
 [IMG]http://i62.photobucket.com/albums/h102/lynzabeth/IMG_20120514_124659.jpg[/IMG]
4) Use your homemade bonemeal on your garden, specifically roses, bulb plants, and tomatoes. Really, if you use a soil test kit, you can know where you need the phosphorus.  According to one site: 

"Plants use phosphorus for cell growth and the development of roots, flowers and fruit. In the vegetable garden the phosphorus present in bonemeal would be beneficial at the beginning of the season, when plants are developing their root systems. Some plants such as tomatoes, eggplants, peppers and melons suffer from a condition known as blossom-end rot, the decay of fruit starting near the blossom end, caused by insufficient calcium. Bonemeal may be of some benefit to correct this deficiency in the soil."

and here:
"Lack of calcium in the soil shows up in many ways. Blossom-end rot in tomatoes is calcium related. As are bitter pit in apples and cavity spots in carrots. Many sorts of fruit deformation can usually be tracked back to calcium deficiency. Some other things to look out for are Necrosis of young leaves, short brown roots, increase in fungus problems, weak stems and just general stunted growth. Basically general garden suckage.
All this stuff is really bad, but most often the result of limited available calcium is just lack of full potential. Most soils have the calcium required to avoid the terrible problems mentioned above, but obtaining that optimum level can really help your garden out...
...Bonemeal is a great, if a tad expensive, organic fertilizer that contains nitrogen and phosphorus as well as 18% calcium with a negligible pH effect."
 Oh, lucky you, you don't have to pay the high price if you know how to make it yourself!

Friday, May 4, 2012

Thanks for checking us out!

Alright, alright, Dyno-mom, you got our attention.  We'll get back to the keyboard.  It's just so hard to sit down at the computer when there's so much to do outside now that the weather is warming up and the chickens are getting big.  Re-Cap!


Our Garden's are growing, our children are getting sunburns every day possible, and the chicken's are living outside, finally.

More soon, but our camera is currently without a battery charger.  It has disappeared and St. Anthony hasn't brought it back yet.  So, for now, go check this out:

Catholic Art and Culture